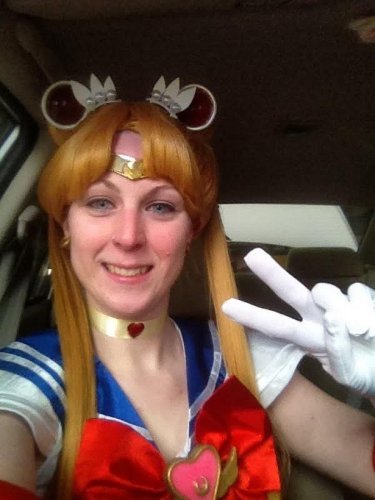
This blog post was provided by Rae Evitt, one of our lovely EpicCosplay customers. She utilized one of our wigs and two clip in ponytails to create her Sailor Moon wig, pictured below! She was kind enough to write us a walkthrough of how she did it and we’d love to share it with all of you in case you’re endeavoring to create a Sailor Moon or Usagi (Serena) cosplay in the future!
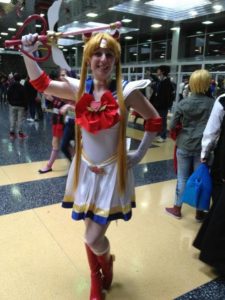
The wigs that she used were our 50 inch wig with two 40 inch pony tail clips. You can find the ones she used at the following links.
Asteria, our straight 50 inch wig. https://blog.epiccosplay.com/50-caramel-blonde-straight-extra-long-cosplay-wig.html
Long Clip On: https://blog.epiccosplay.com/40-caramel-blonde-straight-ponytail-clipon.html
Steps on how I made the wig:
I had to put the front side sections into pig tails. I cut those tails off and kept them for the actual piggy tails for the final product. I don’t have photos of this but I had to rip apart the pony tail clips to remove and use the wefts to sew them into the wig to cover up the bare spots since it is not already a piggy tail wig and on each layer in the back to make the back criss cross look nice and full. I then made the pony tails look nice cropped extra off and hot glued the crap out of the stub piggies. I then hollowed out medium size foam balls and covered them with hair. Then I put the long tails on each piggy stub with a rubber band and hot glue and topped them with their “bun”. I took the wig to a friend’s to cut the bangs. I used freeze spray to hold the wig and curled the bangs in place and WALA it was done!
This took me a long time to do and some trial and error. Your (EpicCosplay) wigs are amazingly durable!! I tangled the crap out of the tails used on the actual wig and you would never be able to tell they comb out and straighten so nicely! I hope you enjoy the photos and it is helpful to anyone wanting to learn this method! 😀
Photos below go in order from start to finish and explain what step it covers underneath. :]
How the wig looks at the start!
I actually used two piggy clips, only one in the photo.
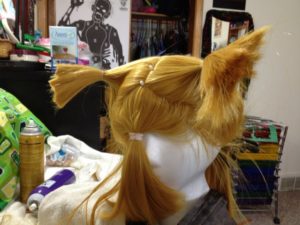
Sewing in wefts to the sides.
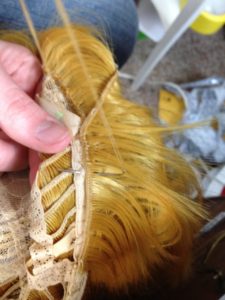
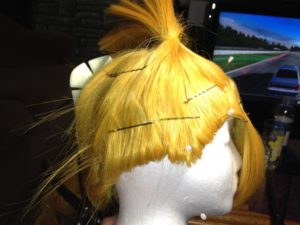
Seeing how the side sewn wefts are filling in the sides.
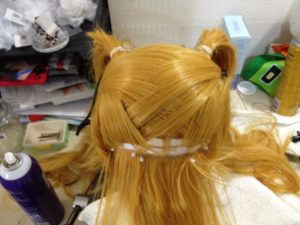
Criss cross to hide the non-flesh part, sewing one to two wefts in per layer to make it thicker so that it is fully covered.
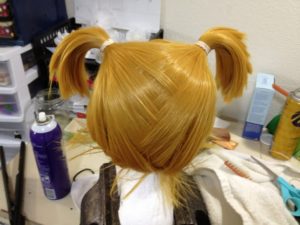
Criss cross done now to put in permanent piggy and crop off the extra.
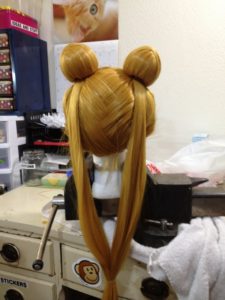
All done, though the bangs still need to be cut and freeze spray finish also needed.
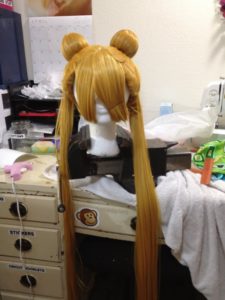
Took the wig to get its bangs cut by a friend who does hair since I cut my bang messed up I figured Id better be smart!
After this I used blasting freeze spray by Got2b to hold the fly aways on the sides up and to hold the curl in the bangs. I used a 1inch barrel for the curling iron; Spraying first then curling, comb, repeat until I liked how it looked. Final freeze and TADA!
Thanks so much for this blog post Rae! We at EpicCosplay learned some new techniques and are sure other cosplayers would take some great information from it too!
Posted by Epic Cosplay on Posted on

